Navigate the user interface
Take some time to familiarize yourself with the SurePoint Cloud user interface. This can help you find the modules and items you need to work with more quickly.
Note: SurePoint Cloud should be used as a starting off point for working in any SurePoint application. All modules and options you have access to in SurePoint Cloud, SurePoint Mobile, LMS+, and LMS V based on your assigned user role and profile can be accessed from the Home screen and Main menu in SurePoint Cloud.
|
UI element |
Notes |
|---|---|
|
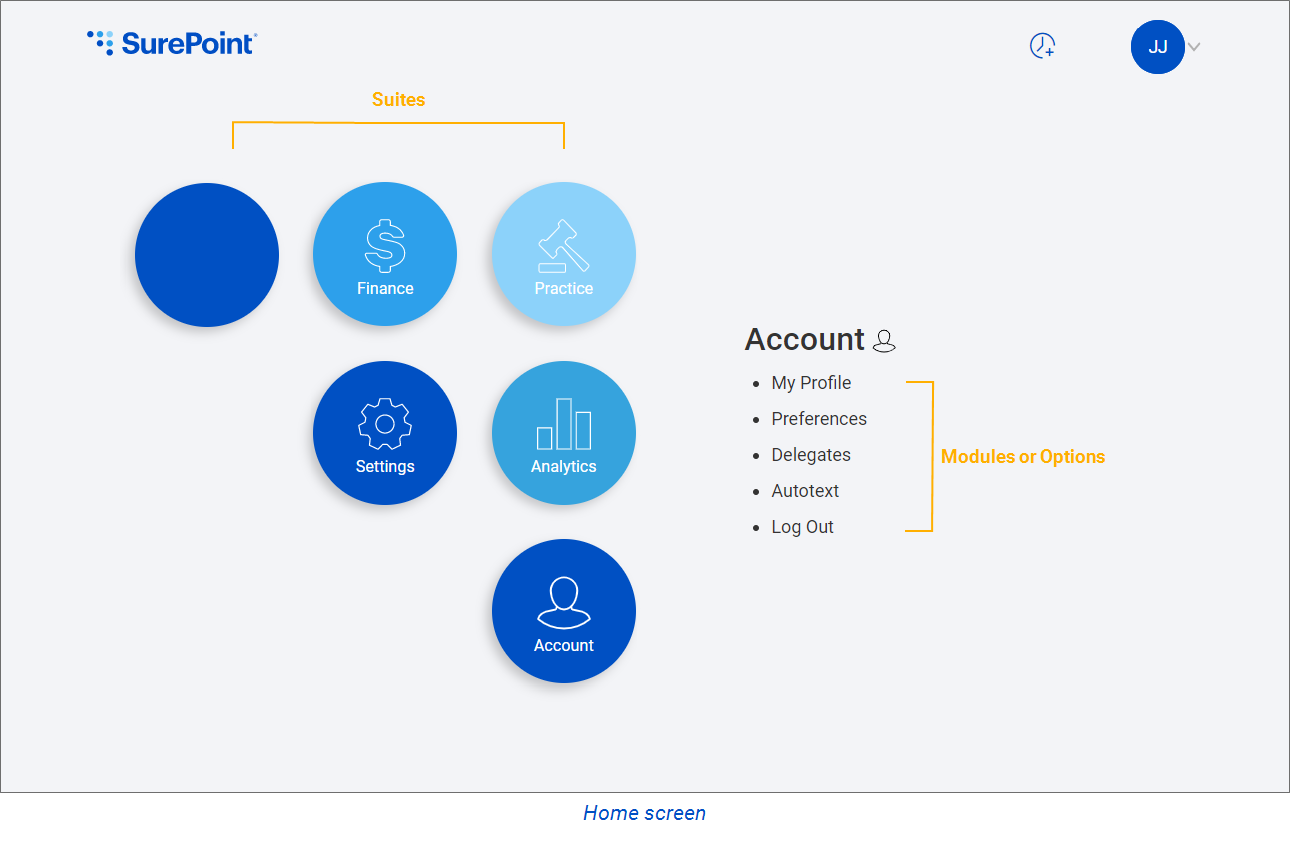
Shows the suites that group related modules and features. The available suites depend on your assigned SurePoint Cloud user role and LMS user profile. Click a suite to view the modules or options in the suite you have access to. See Use the Home screen. |
|
|
Module/Option links on Home screen |
Shows the modules and options you have access to. Click a link to go to the module or options. Some modules open in LMS+ or the LMS V remote application and require logging into the separate application first. See Use the Home screen. |
|
SurePoint logo |
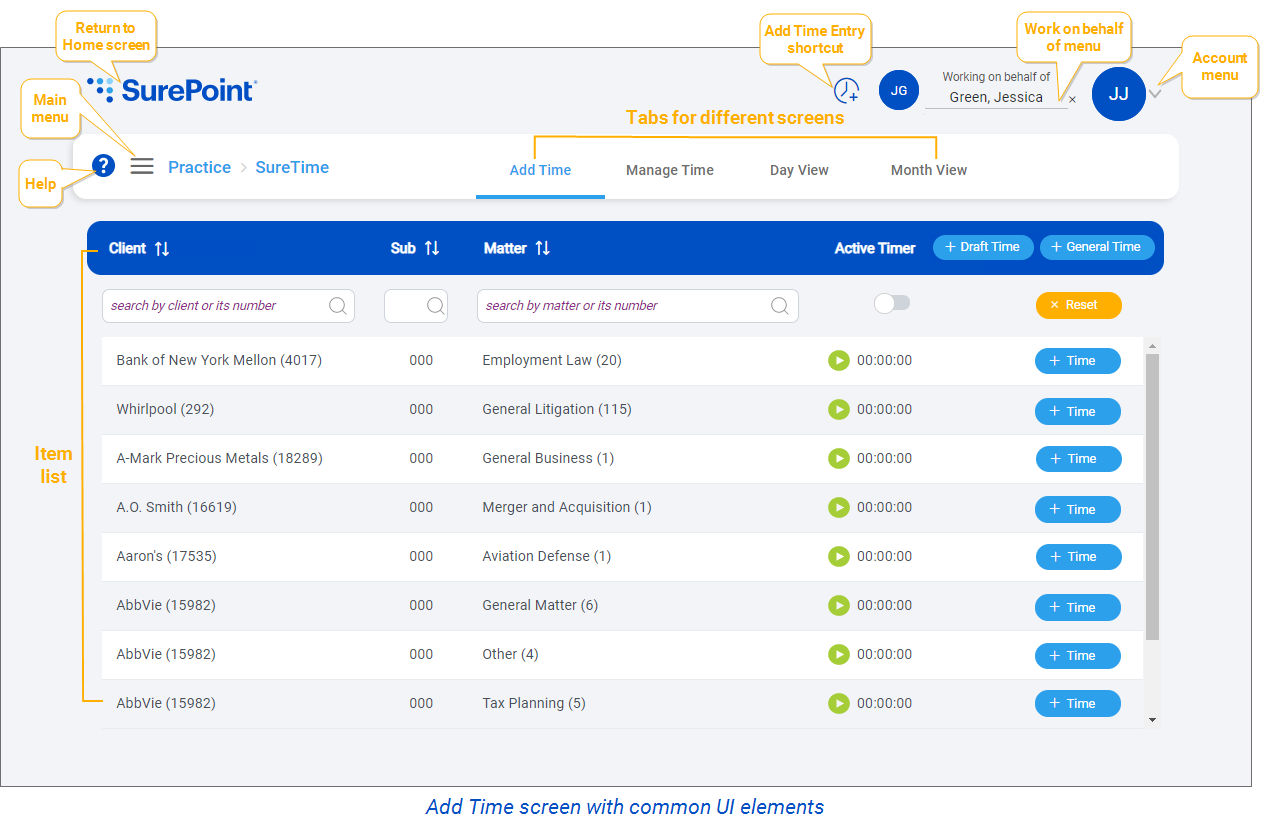
Click the logo to return to the SurePoint Cloud Home screen. |
|
Add Time Entry shortcut |
Click the |
|
Work on behalf of menu |
Shows the list of users who have assigned you as their delegate so you can work on their behalf. Select a user to work on behalf of before performing tasks, such as adding or releasing time entries. The list of users varies based on the module you are working in. See Select who to work on behalf of. |
|
Account menu |
Includes options for changing your password and viewing your assigned roles (via the My Profile screen), setting your personal preferences for modules, assigning delegates to work on your behalf, configuring autotext shortcuts, and logging out of the application. See Use the Account menu. |
|
Includes links to the modules and options you have access to so you can quickly navigate between screens. Open the menu and then click a link to go to the module or options. See Use the Main menu. |
|
|
Help icon |
Click the icon to open the user help in a new web browser tab. See View the help. |
|
Tabs |
Some screens are accessed via tabs inside modules. Click a tab at the top of a screen to switch screens. |
|
Item lists |
Shows the items, or records, available to work with. Click an item to view more details. (Note: Details are not available in all item lists.) Filter lists to view only the items you need or sort lists to view items in ascending or descending order. See Work with item lists. |
 shortcut to add a new time entry from any screen. See