Add a time entry
Add a time entry as you work on a matter to help ensure that billable and non-billable time is captured in an accurate and timely manner. If you are assigned as an attorney's delegate, you can also enter time on behalf of that timekeeper to help ensure their time is submitted to Billing.
Note: The following information explains how to add a time entry for an existing client-matter. To add a draft time entry for a potential client or matter that does not already exist in the system, see Add a draft time entry. To add a general time entry for time not related to a specific client-matter, see Add a general time entry.
On the Home screen, click Practice and then click SureTime. You can also click  on any other screen and select SureTime under Practice.
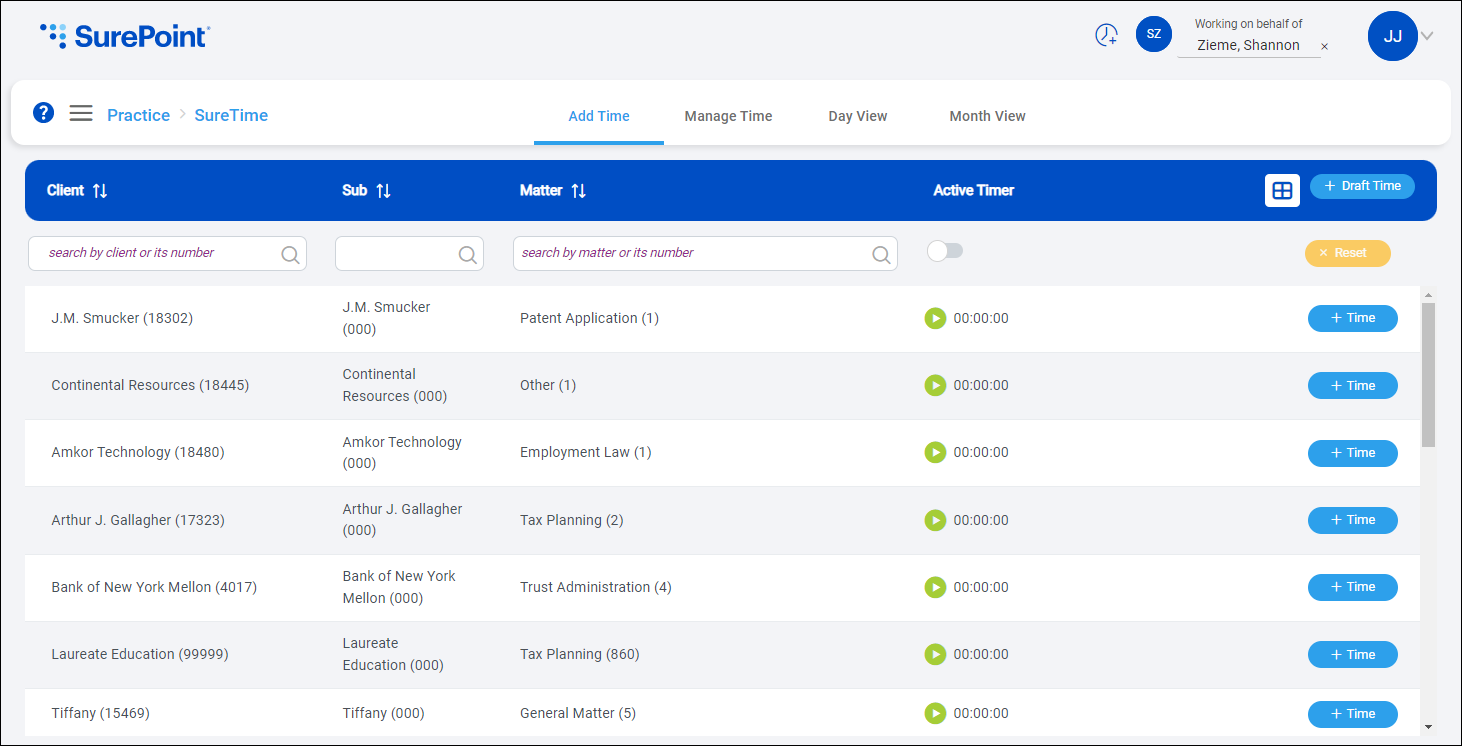
The Add Time screen appears.
Tip: You can also click the  shortcut at the top of any screen to quickly add a new time entry. This shortcut is only available if you are a timekeeper or the user you are working on behalf has delegated 'add and manage time entries' access to you.
 Optionally switch timekeepers
Click Work on behalf of next to the Account menu and select the timekeeper to enter time for.
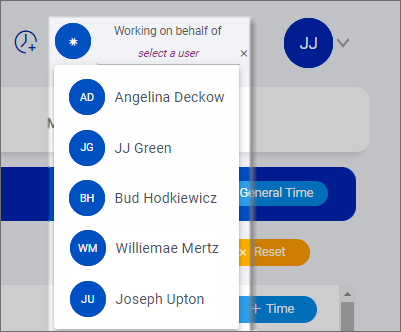
If you are submitting your own time and do not need to switch timekeepers, make sure another user's name is not displayed to the left of the Account menu.
Switching timekeepers and using the shortcut
Using the shortcut on any screen to add a time entry factors in the access delegated to you by the user in the Work on behalf of menu and your timekeeper status.
|
If you are: |
And the working on behalf of user on the screen: |
Then the shortcut is: |
And the time entry will be created for: |
|---|---|---|---|
|
A timekeeper |
Is blank/not selected |
Visible |
You (the timekeeper) |
|
Has delegated 'add and manage time entries' access to you |
Visible |
The selected working on behalf of timekeeper Note: The selected working on behalf of timekeeper will automatically be selected the next time you open any SureTime screen. |
|
|
Has not delegated 'add and manage time entries' access to you |
Visible |
You (the timekeeper, not the working on behalf of user) |
|
|
Not a timekeeper
|
Is blank/not selected |
Not visible |
N/A |
|
Has delegated 'add and manage time entries' access to you |
Visible after the working on behalf of timekeeper has been selected |
The selected working on behalf of timekeeper Note: The selected working on behalf of timekeeper will automatically be selected the next time you open any SureTime screen. |
|
|
Has not delegated 'add and manage time entries' access to you |
Not visible |
N/A |
Select the client-matter
Find the client and matter to add the time entry for in the list.
By default, the list shows the matters with timers started at the top, followed by the most recent matters that a time entry was entered for by the user you are working on behalf of. The remaining matters for the firm are listed in alphabetical order by client and then matter.
If you are a new user who has never entered time in any SurePoint application or used a timer, the list shows the firm's matters listed in alphabetical order by client and then matter.
Tip: You can search for a client or matter to filter the list or sort the list to view clients or matters in ascending or descending order. See Work with item lists.
Note: Only clients and matters with an Accepted status in LMS+ can be selected for time entry. Declined and Temporary clients and matters are not displayed.
Optionally use a timer to record time
-
Click
 next to the matter to start a timer that can capture the duration for the time entry.
 -
To pause and then resume the timer, click
 and
and  , as needed.
Note: Multiple timers can be started and paused at the same time before adding time entries, but only one timer can be running at a time. If a timer is already running but you start a new timer for another matter, the first timer is automatically paused so the new timer can start. To see the active timer at the top of the list, click the Active Timer toggle.
-
To delete the captured time, click
 . Click Yes to confirm the deletion. The timer resets to 0:00:00.
-
-
When you finish your work, click
 to keep the captured time.
The Time Entry screen appears and the captured time is automatically set as the duration. Time captured through the timer is rounded up or down based on the rounding method set in the SureTime Preferences. See Set your preferences.
Skip to step 2 in Enter the time entry information.
Enter the time entry information
-
Click + Time next to the matter to add time for.
Note: The + Time button is disabled if the matter has a Temporary status and LMS is configured to not accept temporary status time entries.
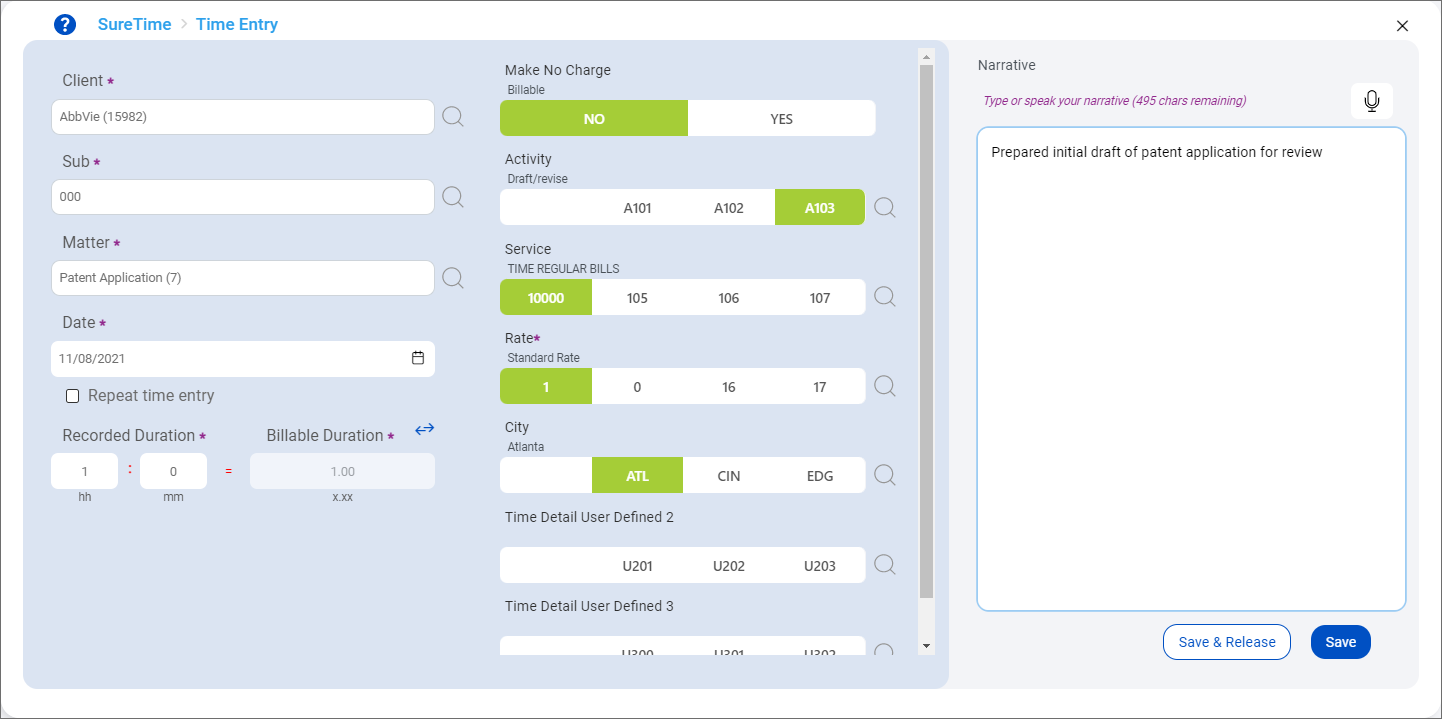
The Time Entry screen appears. All required fields are marked with a purple asterisk (*).
-
Review the Client, Sub client, and Matter.
These fields are populated with the client and matter selected on the Add Time screen. The Sub client field is only available if your firm uses sub clients. If you need to change the client, sub client, or matter, enter the number, name, or description in the corresponding field and then select the correct client or matter from the list that appears. You can also click
 next to a field to see the full list of clients, sub clients, or matters.
Note: If you used the
shortcut to add the time entry, you must select a Client, Sub client, and Matter. The Sub client field is only available if your firm uses sub clients.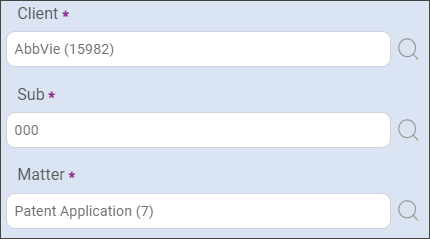
-
Make sure the Date is correct. Today's date is selected by default. Click
 to select a different date.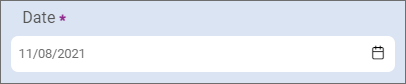
-
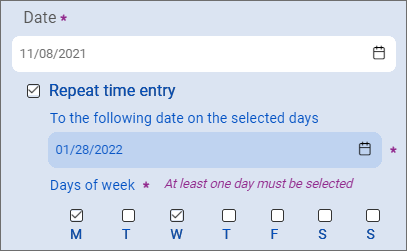
To create the same time entry for multiple days, select Repeat time entry and then select the date to end the repeated time entries on and the appropriate days of the week to create time entries for.
-
-
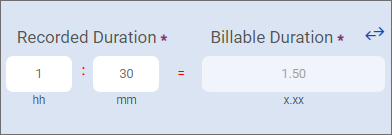
Enter a Recorded Duration in hours (hh) and minutes (mm). If a timer was used on the Add Time screen, the captured time is automatically populated as the recorded duration.
-
To see the duration as hours with decimal points, click
 . You can also use the increment buttons in this view to add the corresponding amount of time to the duration. The available increments depend on the increments accepted for the selected matter. Click again to switch between duration views.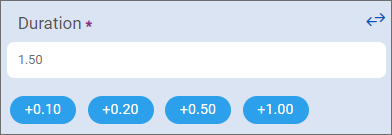
-
-
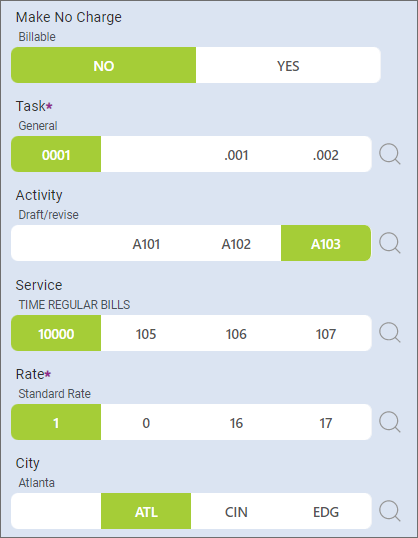
Complete the time entry codes in the middle column of the screen. The available codes and values vary based on the configuration for the selected client/matter and the time entry settings configured in LMS+. The available values for some codes may also change based on the value selected for a preceding code.
-
Make No Charge indicates if the time is billable or not. Yes keeps the time as billable but it will be written off during the time posting process. No will not write off the time at posting. This option is not shown if it is not enabled in your firm's system configuration. If the option is enabled in your firm's system configuration, it cannot be cleared and a value must always be selected in the time entry.
-
Additional time entry codes may be selected based on the default value for the matter type or the value last used in a time entry. Select a value for all required codes marked with a purple asterisk (*).
Some codes may require additional information. For example, rate codes may be configured in a way that prompts you to enter the rate amount in the time entry. Complete all required information for codes.
-
Codes may have a "blank" value configured in LMS+ to indicate that none of the other list values are applicable to the time entry. If configured, the "blank" value is always displayed as the first value for the code on the Time Entry screen. When selected, the value appears as a blank green box, but the value can be cleared to also leave the code blank.
When you click
next to a code, the "blank" value is not displayed in the list of values. -
Codes may have default values configured in LMS+. If you leave a code blank but a default value for that code is configured, the default value is selected when you view the time entry later through the Manage Time screen.
-
-
Enter a Narrative for the time worked. Spelling errors may be marked with red underlining and new sentences may automatically start with a capital letter if the Spell Check and Auto Capitalize preferences are enabled, respectively. See Set your preferences.
Keep the following in mind when entering narratives:
-
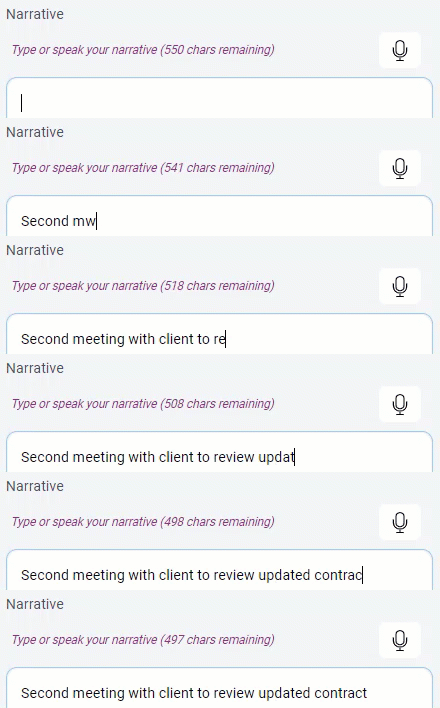
As the narrative is entered, the character count above the field decreases to show how many remaining characters are available. Depending on the character limits configured for the system, an error or confirmation may appear when you exceed the character limit.
-
If an error appears, you must shorten the narrative to save the time entry.
-
If a confirmation appears, you can click Ignore to ignore the limit and save the time entry with the narrative as is or click Cancel to return to the time entry and shorten the narrative.
-
-
You can enter autotext codes to quickly insert standard or frequently used text. The code is automatically replaced with the text when a space is entered after the code.
-
All letters in autotext codes are saved as lowercase; therefore, autotext codes must be entered with lowercase letters to be replaced.
-
You can only enter firm autotext codes or your own personal autotext codes. If you are working on behalf of another user, you cannot use that user's personal autotext in the narrative.
-
If you are using an autotext code before a punctuation mark, such as a comma or period, you must enter a space before the punctuation mark for the autotext replacement to happen.
-
If you have configured a personal autotext code that matches a code configured at the firm level, the personal autotext will be used. For example, if "mwc" is set as a firm level autotext code to be replaced with “Married With Children” and it is also set as a personal autotext code to be replaced with “meeting with client”, “meeting with client” appears in the narrative when a space is entered after "mwc". For information about viewing and creating autotext codes, see Manage autotext codes.
Note: Autotext codes are replaced before a space is entered on Android tablets. If multiple autotext codes with the same beginning characters are configured, the code with the fewest characters is used for the replacement before a space can be entered. For example, if "mwc" is set to be replaced with "meeting with client" and you have another autotext code of just "mw" for "meeting with", when you enter "mw" in the narrative, "meeting with" automatically appears in the narrative before you can enter the "c". This issue is only known to occur on Android tablets. If you have multiple autotext codes with the same beginning characters, review your narrative closely before saving or consider using autotext only when entering time on your computer.
-
-
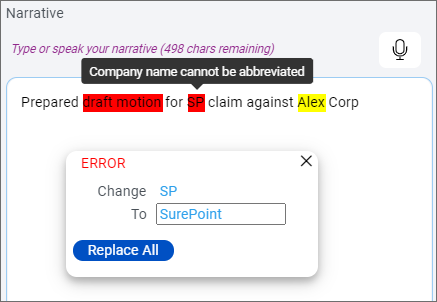
Any restricted words entered in the narrative are highlighted. Words highlighted in red are configured as errors and they must be replaced before the time entry can be released. Words highlighted in yellow are configured as warnings, which means they do not have to be replaced to release the time entry but they do include recommendations for a replacement to consider instead. All restricted words must be replaced or ignored to save the time entry.
-
Hover over a restricted word to view a message about the restriction. If a message about the restriction was not included when the restriction was set up, a small, black pop-up with no text appears.
-
To replace a restricted word, click it. Keep the recommended replacement in the To field or enter a different replacement. Click Replace All to replace all instances of the word in the narrative. The word is replaced and the highlighting is removed.
-
To ignore a restricted word that is configured as a warning, click it and then click Ignore All to ignore all instances of the word in the narrative. The word is ignored and the highlighting is removed. Restricted words configured as errors cannot be ignored and must be replaced.
-
-
Click
 to dictate a narrative. To stop recording, click again.
Tip: If you are working on a tablet, you can also use the operating system's voice dictation to record the narrative.
Note: Autotext codes must be spoken letter-by-letter when using voice dictation to be recorded and then replaced. Autotext codes spoken as acronyms, or abbreviations that are pronounced as words, are likely not going to be captured correctly. For example, if you have an autotext code of "ABA" for American Bar Association, you need to say, "A B A" instead of "abba" to have the replacement text transcribed. As a best practice, always review narratives after you stop recording and make any necessary edits to ensure the text is accurate before you save the time entry.
-
If the narrative's maximum character limit is hit, additional characters cannot be entered. If an autotext code or restricted word's replacement will exceed the character limit, the replacement is not made unless you shorten the narrative to accommodate the characters for the replacement text.
-
-
Click Save to save the time entry and release it later or click Save & Release to save and automatically release the time entry, if it is valid against your firm's compliance policies.
Note: The Save & Release option is only available if you are assigned a user role with access to release time entries.
The save process may take a few seconds while the entry is validated.
-
If the entry is valid, a green message briefly appears in the upper-right corner of the screen to notify you that the entry was saved and released, if you chose to also release it. Depending on your SureTime preferences, the Time Entry screen remains open or you are redirected to the Add Time or Manage Time screen. See Set your preferences.
-
If any errors are found in the entry, a confirmation message is displayed. Click Stay to return to the time entry, review the errors in red text on the screen, and then correct them before saving the entry again. Click Save with errors to save the time entry with errors to correct later. The time entry with errors will have an Invalid status on the Manage Time screen and must be corrected before it can be released.
-
After time entries are added, you can view and release them on the Manage Time screen. See Manage time.
