Add a general time entry
If your firm uses SureTime to capture general time that is not dedicated to a specific client-matter, such as for training, continuing legal education (CLE), or paid time off (PTO), you can add a general time entry to save and submit the time. Non-chargeable staff can also use general time entries to record their daily time for payroll purposes, if needed.
-
On the Home screen, click Practice and then click SureTime. You can also click
 on any other screen and select SureTime under Practice.
The Add Time screen appears.
-
Optionally click Work on behalf of next to the Account menu and select the user to work on behalf of.
If you do not need to work on behalf of someone else, make sure another user's name is not displayed to the left of the Account menu.
-
Click + General Time.
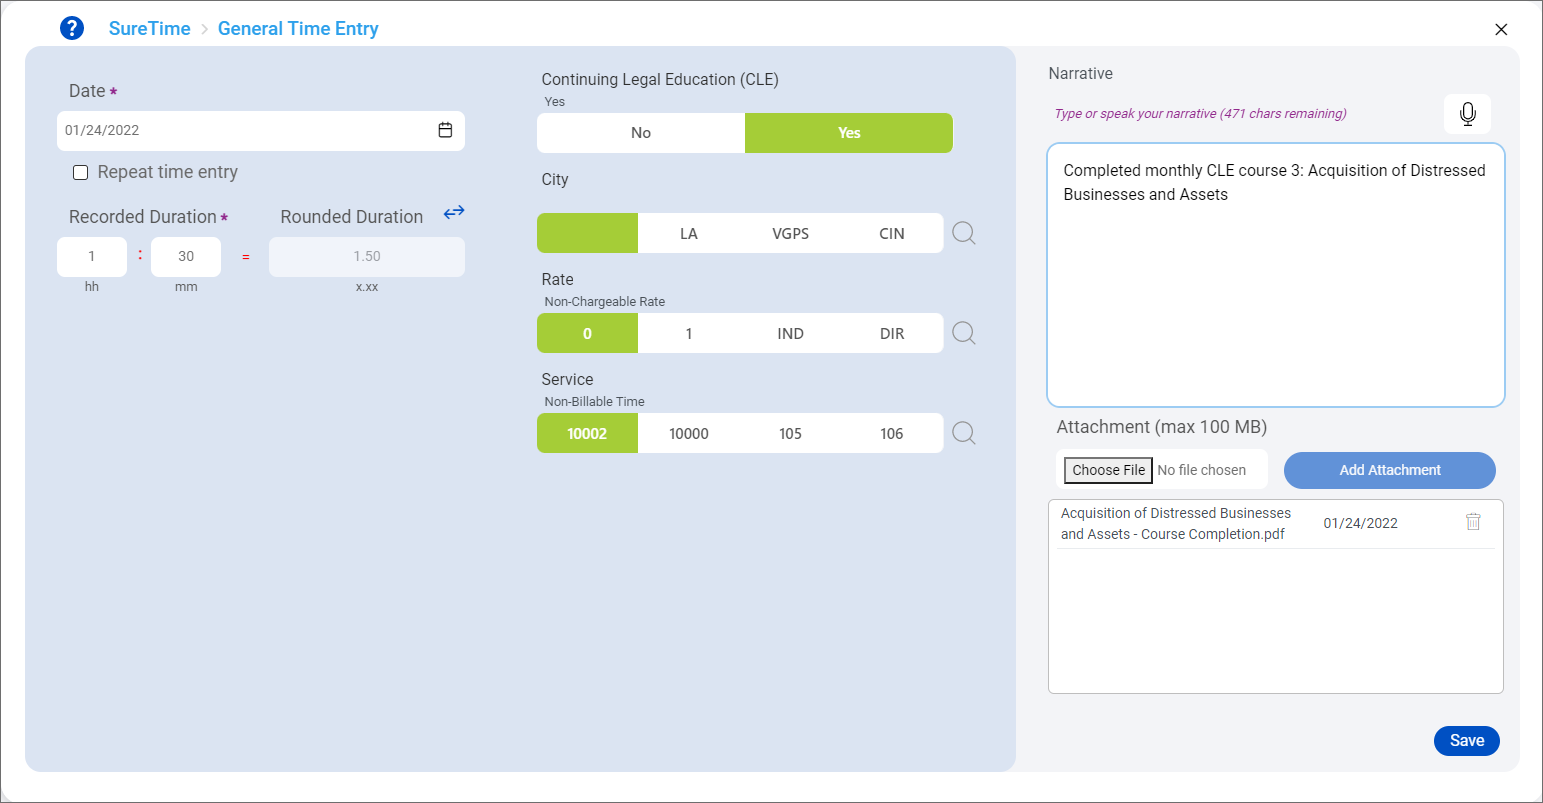
The General Time Entry screen appears.
-
Enter the time entry information.
Following are the default settings for fields.
Field
Default value
Date
Today's date. Click
 to select a different date. Date is a required field.
To create the same time entry for multiple days, select Repeat time entry and then select the date to end the repeated time entries on and the appropriate days of the week to create time entries for.
Duration
Blank. Enter a duration in hours (hh) and minutes (mm). You can also click
 to enter a duration with decimal points or use increment buttons to add the corresponding amount of time. Click again to switch between duration views. Duration is a required field.
Codes
Varies based on your firm's general time entry configuration.
Narrative
Blank. Enter a narrative that explains the time or click
 to dictate a narrative. For information about using autotext codes in narratives or addressing restricted words, see Add a time entry.
Attachment
Blank. Click Choose File, locate the file to attach, and then click Add Attachment. The file is listed under the Add Attachment button. A maximum of 100 MB or 50 individual files can be attached to a general time entry at a time.
-
Click Save.
A green message briefly appears in the upper-right corner of the screen to notify you that the time entry was saved. Depending on your SureTime preferences, the General Time Entry screen remains open or you are redirected to the Add Time or Manage Time screen. See Set your preferences.
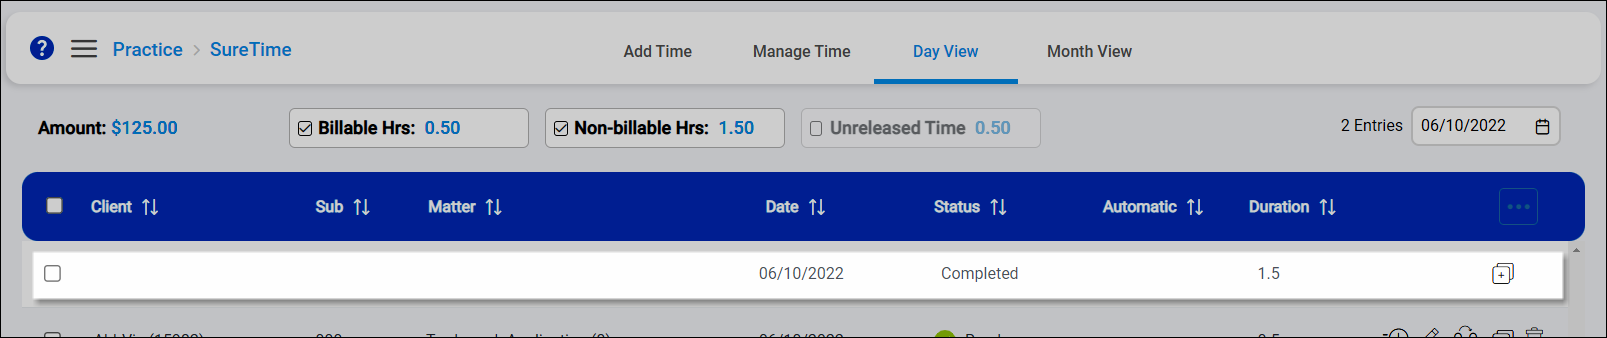
You can view the general time entry on the Manage Time or Day View screen. The general time entry shows a blank client and matter and a Completed status as long as the date and duration are provided. If the date or duration is missing, the general time entry shows an Invalid status and needs to be edited to change the status to Completed. No additional steps are needed once a general time entry has a Completed status.