Bulk change multiple time entries at the same time
Use bulk changes to apply the same edits to multiple time entries at the same time. For example, if you need to set the same rate for three different time entries, you can select all three entries and then bulk change the rate to update them all with a single action.
Tip: You can also open multiple time entries for editing at the same time and make changes in them one-by-one if you need to make unique changes to the entries. See Edit a time entry.
- On the Home screen, click Practice and then click SureTime. You can also click
 on any other screen and select SureTime under Practice.
 -
Optionally click Work on behalf of next to the Account menu and select the user to work on behalf of.
If you do not need to work on behalf of someone else, make sure another user's name is not displayed to the left of the Account menu.
-
Click the Manage Time or Day View tab.
The Manage Time or Day View screen appears.
-
Find two or more time entries to change and select the check box to the left of each entry.
Note: Released and Posted time entries cannot be changed. General time entries cannot be included in a bulk change, but they can be edited individually by clicking
 next to them.
 -
Click
 in the column header area and select Bulk Change Selected Time Entries. The number of time entries selected to be changed is displayed at the top of the menu.
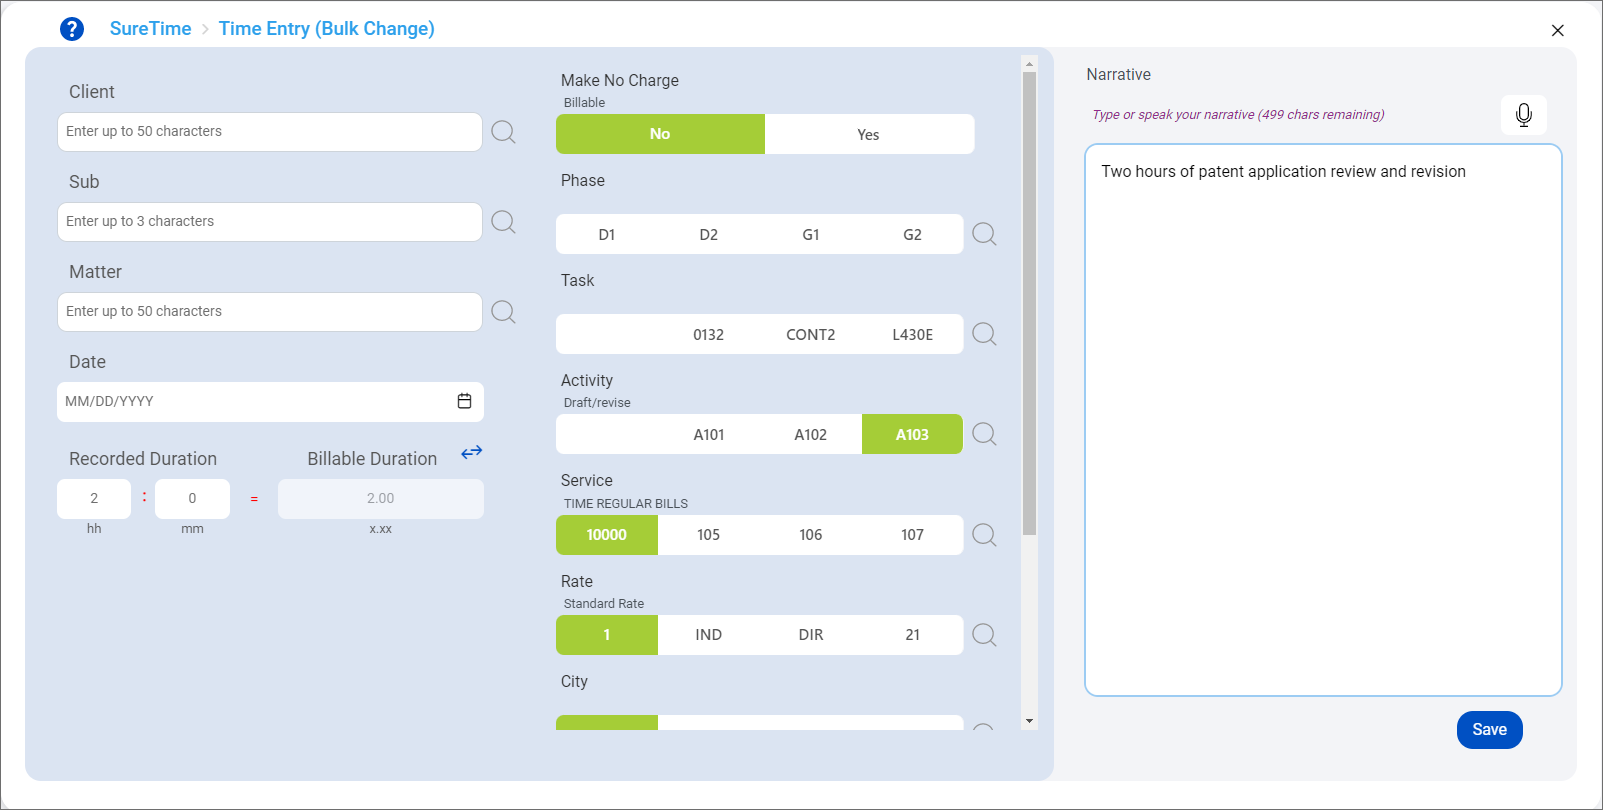
The Time Entry (Bulk Change) screen appears.
-
Make any changes that should apply to all the selected time entries. Only the fields you make changes to will be updated in the selected time entries. For example, if you only select a Date, the Date will be updated in the selected time entries but the rest of the existing values in the entries will not be affected. For information about the fields on the Time Entry (Bulk Change) screen, see Add a time entry.
Note: If you change the narrative, the entire narrative is replaced in the selected time entries.
-
Click Save.
-
If the changes are valid, a green message briefly appears in the upper-right corner of the screen to notify you that the selected time entries were updated. When you return to the Manage Time or Day View screen, you can expand the time entries' details to see the changes.
-
If the changes cause errors for the selected time entries, a confirmation message is displayed. Click Stay to return to the Time Entry (Bulk Change) screen, review the errors in red text on the screen, and then correct them before saving the changes again. Click Save with errors to apply the changes to the time entries and change their status to Invalid until the errors are corrected later.
Note: After saving bulk changes, it may take a few seconds for the selected time entries to show status changes, if applicable, on the Manage Time or Day View screen.
-
