Edit user access
During your firm's initial onboarding to the SurePoint Mobile app, users are synced from LMS and automatically assigned the Default Time Management Security role so they can enter time in the mobile app. No additional actions should be needed, but if a user reports they cannot access the SurePoint Mobile app or set up their password, the firm's system administrator can verify that the Default Time Management Security role is assigned to the user and assign it if it is missing.
-
On the Home screen, click Settings and then click Access. You can also click
 on any other screen and select Access under Settings.
The Users screen appears.
-
Find the user to edit and then click
 next to it.
To open multiple users for editing, select the check box to the left of each user to edit, and then click
 in the column header area and select Update Selected Users.
Tip: You can search for a user to filter the list or sort the list to view users in ascending or descending order. See Work with item lists.
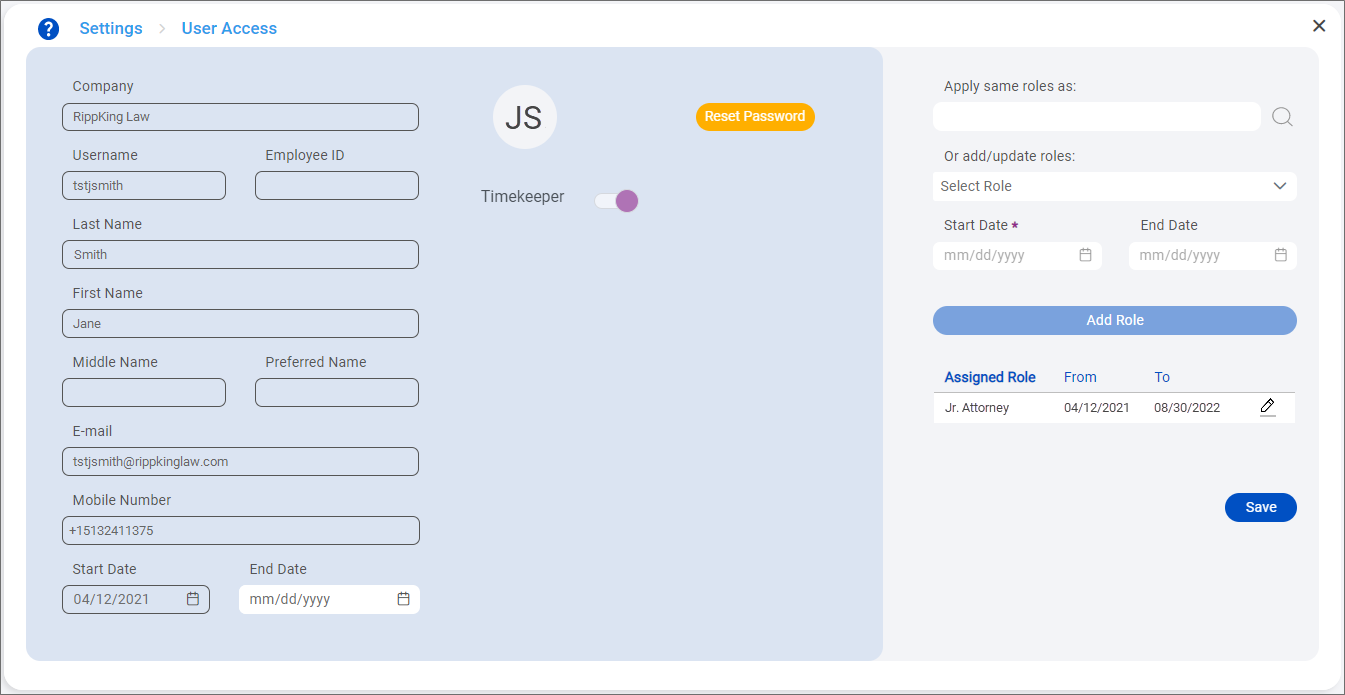
The User Access screen appears. The user information on the left side of the screen is mostly read-only data from the user's account in LMS.
If the user is set up in LMS as an attorney responsible for tracking and submitting their billable time to clients, the Timekeeper toggle is slid to the right. If not, the toggle is slid to the left. This setting is controlled in LMS and cannot be changed in SurePoint Cloud.
 Assign roles
Note: When new roles are assigned, users must log out and then log back in to receive access to the role. If a user is currently working in SurePoint Cloud and you assign them a new role, they will be logged out automatically. It is recommended to let users know about role changes before making these updates to ensure they are not logged out unexpectedly in the middle of a task.
-
On the User Access screen, select the role to assign to the user.
-
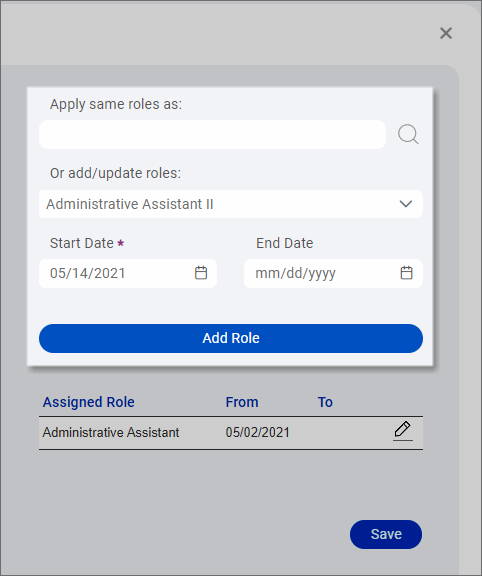
To assign the same active roles already assigned to another user, select the user to copy from in the Apply same roles as field. You can enter a user's name or email address to find them in the list or click
 to see the full list of users. Roles that have ended are not copied.
 -
To assign a single role to the user, select the appropriate role in the Or add/update roles list.
-
-
Select the Start Date for the role assignment. The assignment's start date cannot be before the user's or role's start date.
Optionally select an End Date if the role assignment is only needed for a specific time period.
Note: If you applied the same roles as another user, today's date is set as the Start Date and no End Date is set. You must edit the role after it is saved if you want to set an End Date.
If you selected a role to add and set the same start and end dates, the user will not receive the role's access.
-
Click Add Role.
The role is added to the Assigned Roles list.
-
Repeat steps 1 - 3 to assign additional roles to the user.
Note: If multiple roles with conflicting Full and Inquiry access to the same feature are assigned to the user, the user will have full access to the associated feature.
-
Click Save.
The user receives access to the role the next time they log in. If the user is currently logged in, they are automatically logged out for the role changes to take effect.
-
If you opened multiple users at the same time, click
 or
or  in the upper right corner of the screen to move between users. Assign the appropriate roles to each user and then save the changes to each user.
 -
Close the User Access screen when you finish.
Remove roles
Roles are removed by setting an end date. If you assigned an incorrect role to a user by mistake, you can immediately update the role and select the same end date as the start date to prevent the user from receiving access.
Note: End dates can only be changed if they are set to the current day or a day in the future. If a role's end date has passed, the role must be reassigned to the user to restore access.
-
On the User Access screen, click
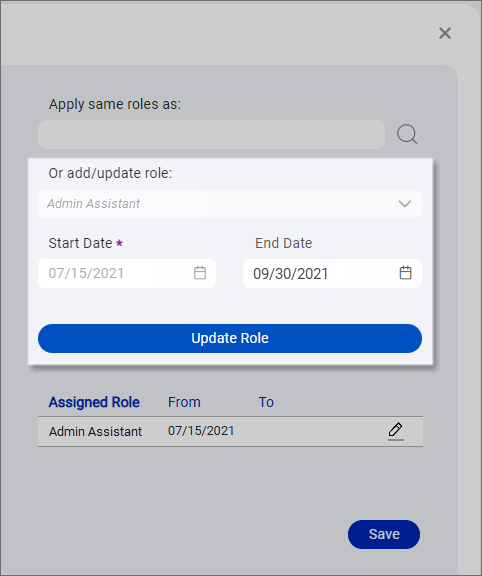
next to the role to remove in the assigned roles list.The role and its start date are populated above the assigned roles list.
-
Select the last valid day for the role as the End Date.
-
Click Update Role.
The role's To date is updated.
-
Repeat steps 1 - 3 to set end dates for any additional assigned roles.
-
Click Save to save the changes.
If you set today at the end date for any role, the user's access to that role is removed immediately. If you set a future end date, the user will have access through 11:59 PM on the selected date.
-
If you opened multiple users at the same time, click
or in the upper right corner of the screen to move between users. Set an end date for the appropriate roles for each user and then save the changes to each user. -
Close the User Access screen when you finish.
Remove all user access
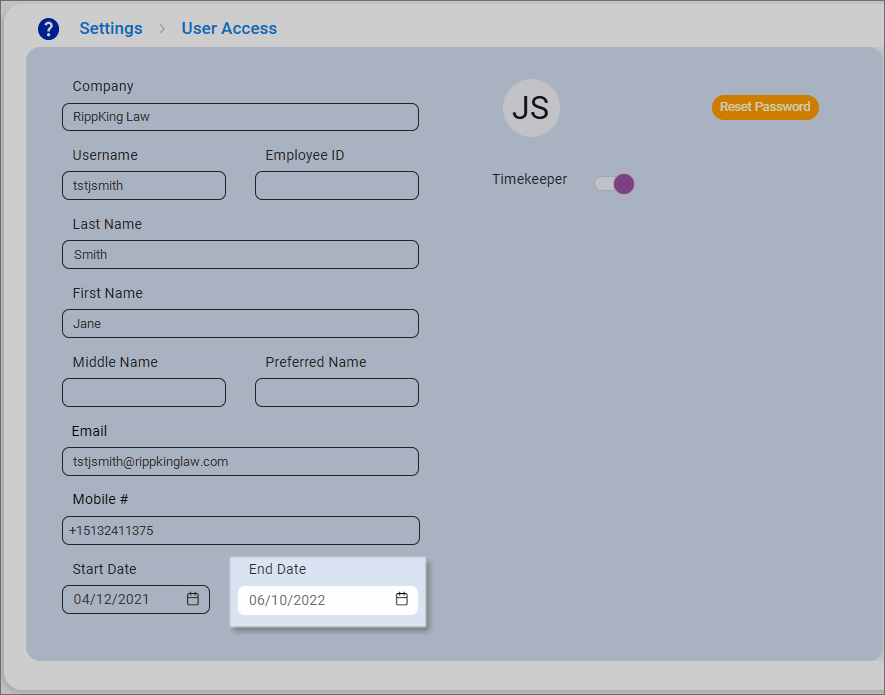
All access for a user is removed by setting an end date for the user.
Note: These end dates can be cleared or changed later to restore user access, even if the currently set date is in the past.
-
In the user information on the left side of the User Access screen, select the last valid day for the user's access as the End Date.
-
Click Save to save the changes.
The To date for all the user's active roles is set to the same end date. If you set today at the end date, the user's access to their roles is removed immediately. If you set a future end date, the user will have access through 11:59 PM on the selected date.
-
If you opened multiple users at the same time, click
or in the upper right corner of the screen to move between users. Set an end date for each user and then save the changes to each user. -
Close the User Access screen when you finish.
Restore user access
If you need to restore access to a user who has an end date set in their user information, such as a former or temporary employee returning to work, you can clear or change that end date and then assign them a new role to restore their access.
-
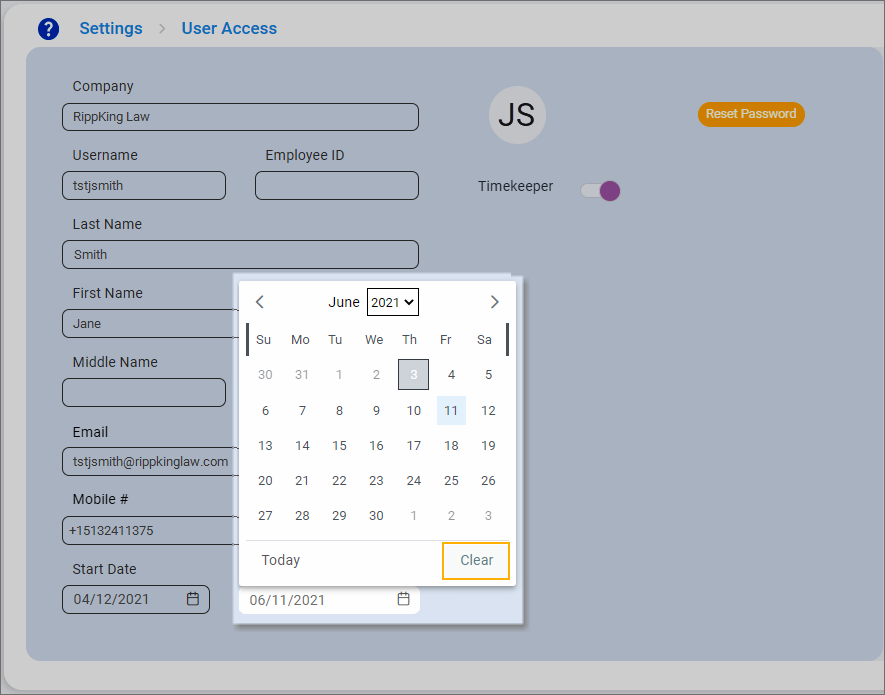
In the user information on the left side of the User Access screen, click the End Date and then click Clear under the calendar. You can also select a different end date in the future, if needed.
-
Assign a role to the user to restore their access. See Assign roles.
-
Click Save to save the changes.
The user receives access to the role the next time they log in on or after the start date set for the role.
-
If you opened multiple users at the same time, click
or in the upper right corner of the screen to move between users. Clear or change the end date for each user and then save the changes to each user. -
Close the User Access screen when you finish.
