Add a conflict waiver
Waivers that you have received from clients can be added to SureClear and then applied to formal conflict search results to document that consent was provided related to a potential conflict of interest.
You can add waivers that are specific to a client, client-matter, client-matter and party, or client and party. The level at which the waiver applies to depends on the scope and conditions of the waiver itself. For example, if your client XYZ Corp provides a waiver for all of their matters that include their CFO, John Doe, as a party, then the waiver can be added with the Client and Party selected to indicate that it only applies to search results that match John Doe at XYZ Corp.
-
On the Home screen, click Practice and then click SureClear. You can also click
 on any other screen and select SureClear under Practice.
 -
Optionally click Work on behalf of next to the Account menu and select the user to work on behalf of.
If you do not need to work on behalf of someone else, make sure another user's name is not displayed to the left of the Account menu.
-
Click the Waivers tab.
The Waivers screen appears.
-
Click + Waiver.
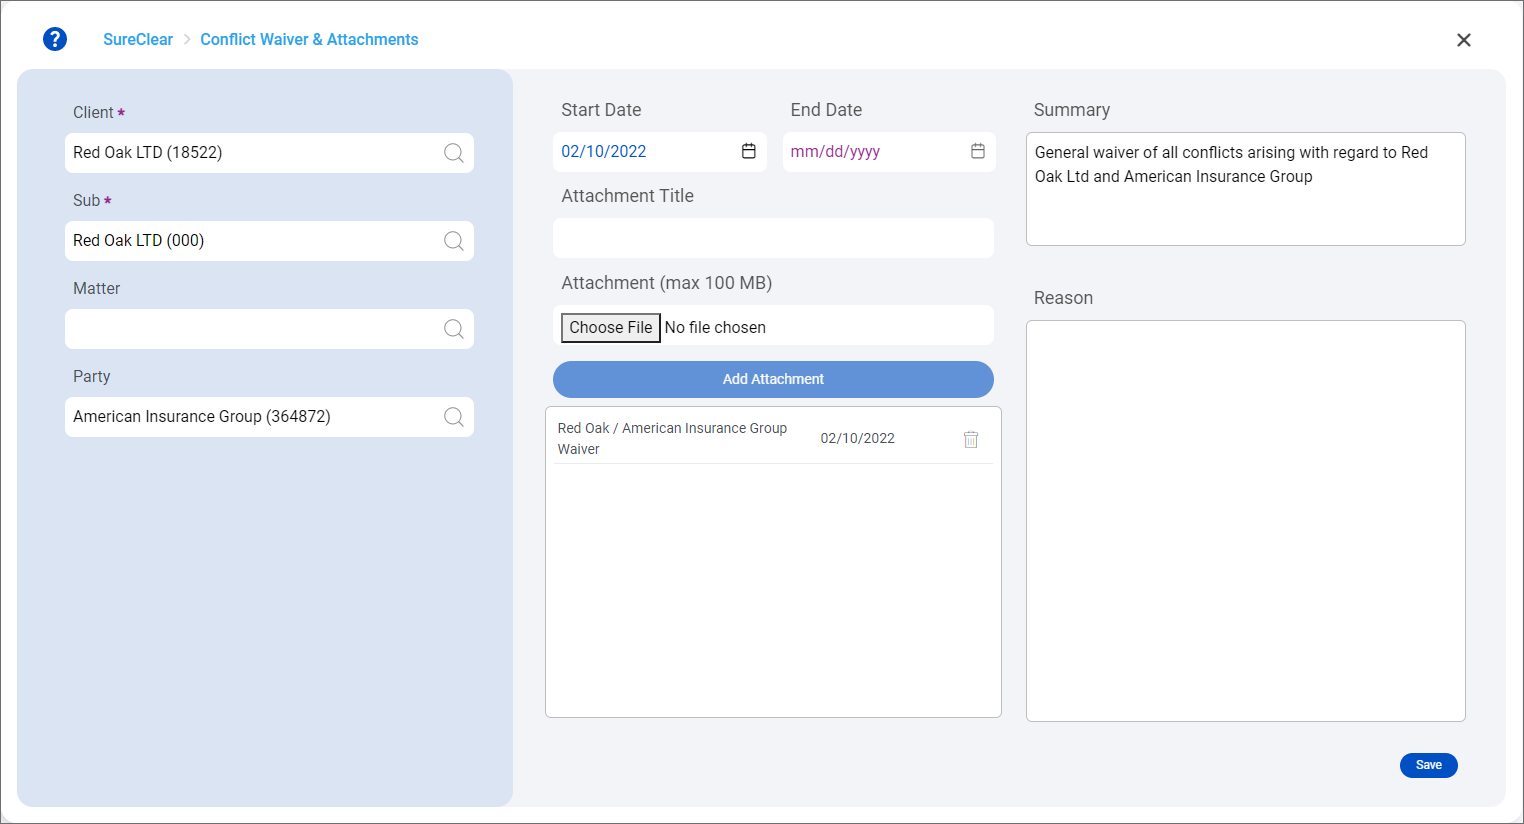
The Conflict Waiver & Attachments screen appears.
-
Select the Client and Sub client the waiver applies to. The Sub client field is only available if your firm uses sub clients.
Optionally select a Matter if the waiver should be applied to a specific matter.
Optionally select a Party if the waiver should be applied to a specific party for the selected client or matter.
-
Select a Start Date for the waiver. Today's date is selected by default.
Note: An End Date cannot be set when adding a new waiver. When waivers have an end date set, even if it is set to a future date, they cannot be applied to Open conflict searches.
-
If you have a file, such as a signed consent form, add it as an attachment. A maximum of 100 MB or 50 individual files can be attached at a time.
-
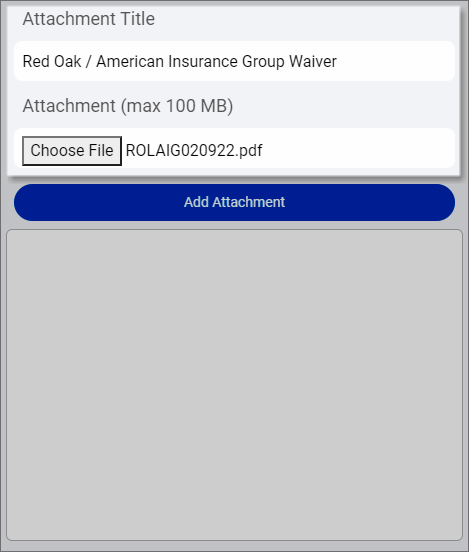
Optionally enter an Attachment Title to provide a brief, clear description of the file. If you want to use the existing file name, you do not need to provide an attachment title.
-
Click Choose File and then locate the file to attach.
-
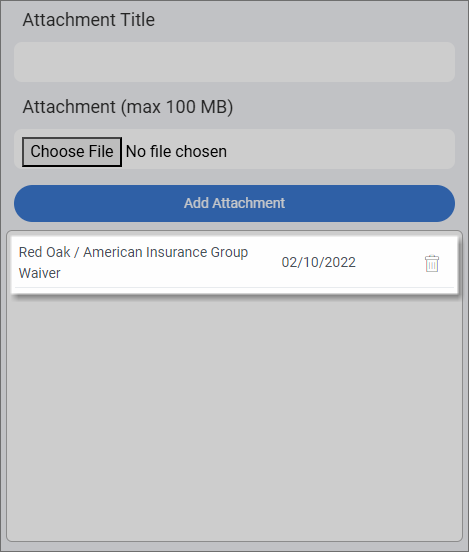
Click Add Attachment.
The file is listed under the Add Attachment button.
-
Repeat steps 8a - 8c to attach any additional files.
-
To delete an attachment, click
 next to it. You are not prompted to confirm the deletion if the waiver has not been saved yet.
-
- Enter a brief Summary of the waiver and a Reason to explain the need for the waiver.
-
Click Save.
The waiver is added and you return to the Waivers screen.
Note: The waiver may appear in purple italicized text to indicate a Processing status while the system checks results in all open formal conflict searches. Refresh the screen to see the status change so you can keep working with the waiver.
If you are working on an Open formal conflict search that you know the waiver applies to, you can edit the waiver and apply it to the search. See Apply a waiver to conflict search results.
When you are reviewing results for other conflict searches, if the waiver is a possible match for any search results, you will see the Available status in the Waiver column for the results. You can then return to the waiver and add it to the search if it also applies to those results.
