Manage conflict actions
Conflict actions are added to formal conflict search results to create a history of how a potential conflict was handled. SurePoint Cloud includes a set of standard conflict action types, but a system administrator needs to create the exact actions that a Conflict Management team member can select as decisions about the potential conflict have been made. These conflict actions are displayed in the Action field on the Conflict Actions & Attachments and Conflict Actions & Attachments (Bulk Action) screens.
-
On the Home screen, click Settings and then click SureClear. You can also click
 on any other screen and select SureClear under Settings.
 -
Optionally click Work on behalf of next to the Account menu and select the user to work on behalf of.
If you do not need to work on behalf of someone else, make sure another user's name is not displayed to the left of the Account menu.
-
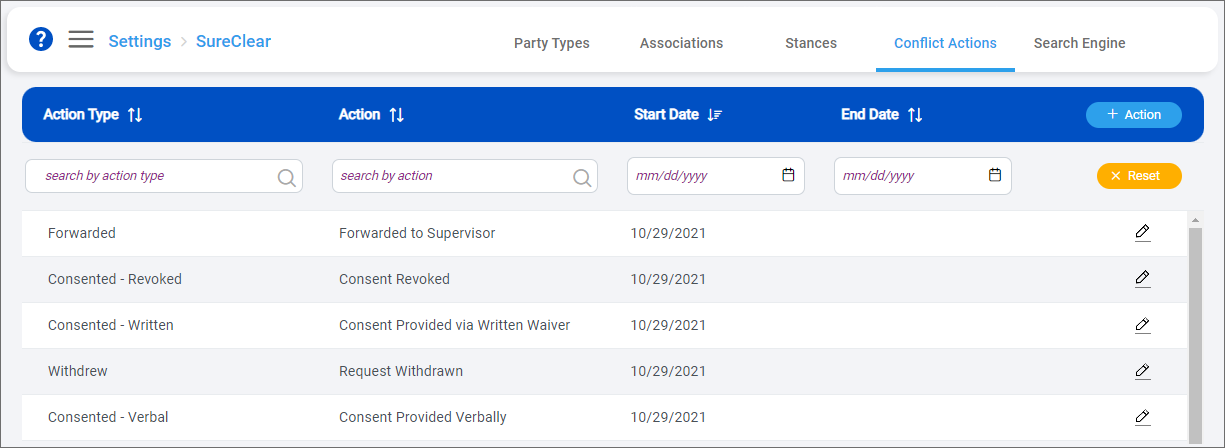
Click the Conflict Actions tab.
The Conflict Actions screen appears.
-
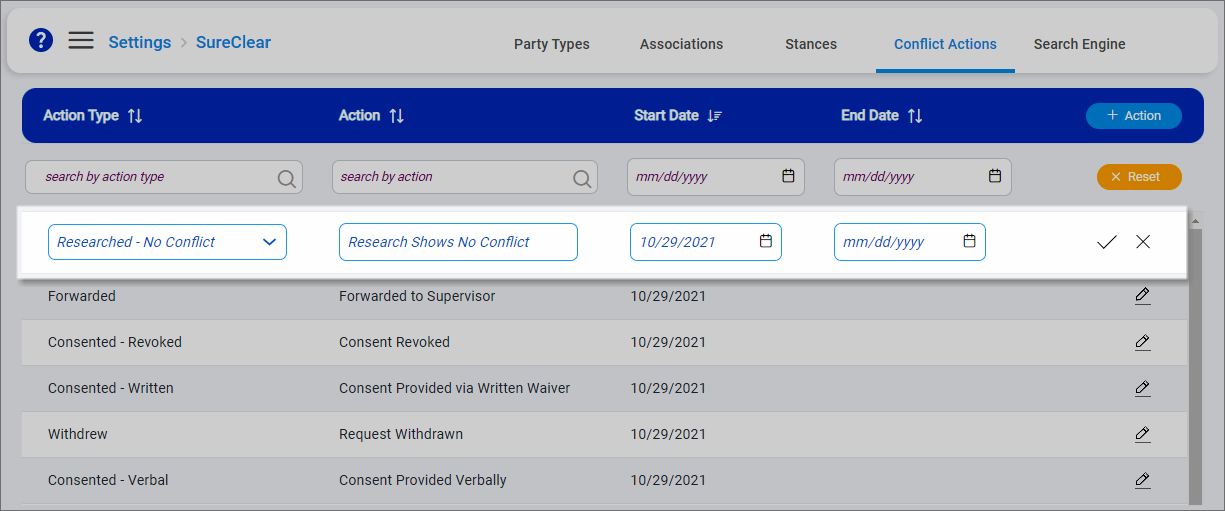
Click + Action to add an action.
An empty row is added to the top of the list.
-
Select the Action Type. Available action types include:
Action type
Description
Consented - Verbal
Verbal consent was provided
Consented - Written
Written consent was provided
Consented - Revoked
The previously issued consent has been revoked
Forwarded
The search result was forwarded to another team member for review and the final action to take
Researched - No Conflict
No conflict was found after appropriate research was completed
Declined Representation
The party declined legal representation
Withdrew
The party withdrew their request for legal representation
-
Enter the Action.
-
Select a Start Date for the action.
Optionally select an End Date if the action is only needed for a specific time period.
-
Click
 to save the action.
 -
To remove a conflict action, click
 next to it, enter an End Date, and then click . If you set today at the end date, the action is deactivated immediately. If you set a future end date, the action is active through 11:59 PM on the selected date.
